
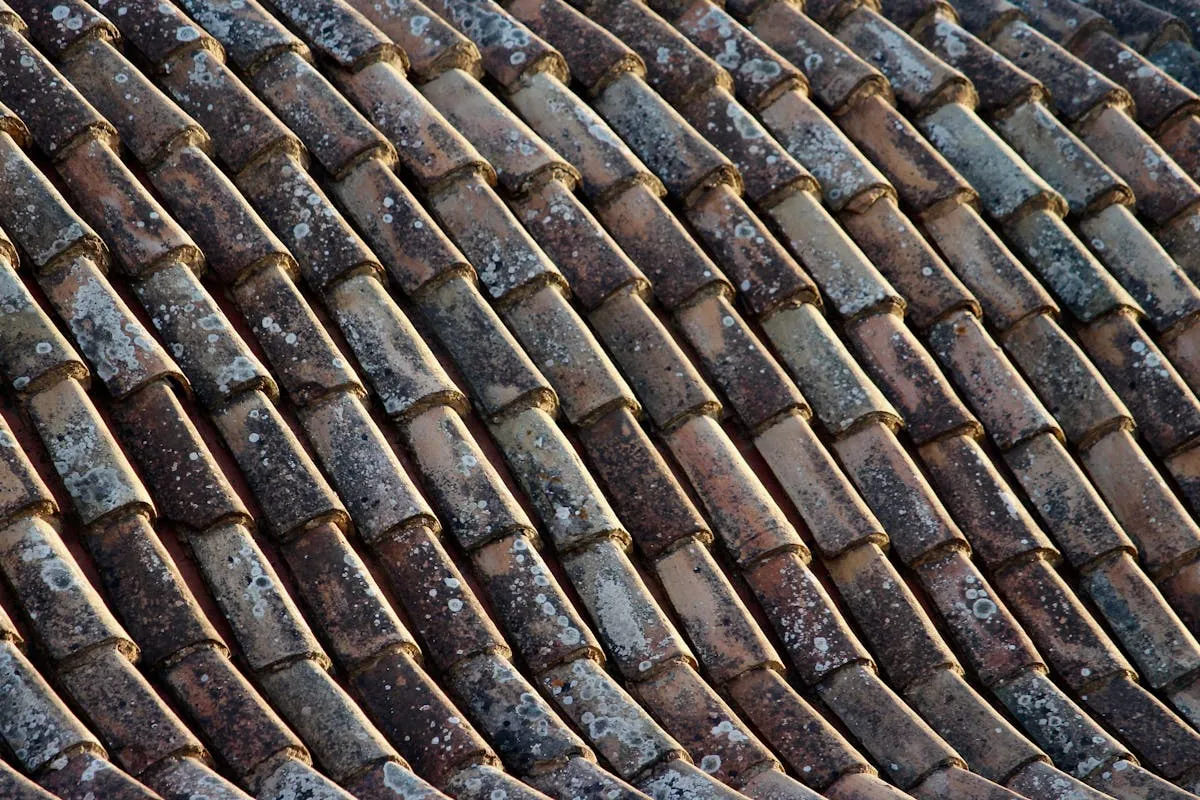
Tile Roof Cleaning: Concrete, Clay, and Slate
Clean tile roofs safely: proper methods for concrete, clay, and slate tiles. Protect roof integrity while removing algae, mold, and lichen without walking on fragile tiles.
Key Takeaways
- Never pressure wash tile roofs - High pressure damages tiles and voids warranties
- Soft wash only - Sodium hypochlorite (2-3% SH) with surfactant, applied from ground or ladder
- Don’t walk on tiles - Tile breaks easily under foot traffic; work from ladders or use roof walkers
- Protect surrounding surfaces - Roof runoff contains chemicals that kill plants and stain surfaces
- Professional recommended - Tile roofs are expensive; mistakes cost thousands
Understanding Tile Roofs
Tile roofs are premium systems—concrete, clay, or slate tiles that can last 50-100 years when maintained. They’re beautiful, durable, and fire-resistant. But they’re also unforgiving of mistakes.
Tiles are fragile. Walking on them breaks them—especially concrete tiles which become brittle with age. The tiles overlap in a specific way to shed water. High pressure can blast water under tiles, causing leaks to the structure below. And the surface texture that gives tile roofs character also catches algae, mold, and lichen aggressively.
Mistakes are costly. Broken tiles, water intrusion, voided warranties, and massive repair bills result from improper cleaning. Tile roof cleaning is not DIY-friendly for most people.
Tile Types and Their Challenges
Concrete Roof Tiles
Most common in warm climates. Made from cement, sand, and pigment. Last 50+ years but become brittle with age. Heavy—concrete tiles weigh 600-900 pounds per square (100 sq ft).
Concrete tiles are porous and absorb water. Algae grows in the pores. Surface texture provides perfect grip for lichen. Tiles crack if walked on incorrectly. In coastal areas, concrete tiles accumulate salt spray, which accelerates wear.
Clay Roof Tiles
Traditional terra cotta tiles, common in Mediterranean and Spanish-style architecture. Made from fired clay. Last 75-100+ years. More expensive than concrete but more durable. Lighter than concrete (400-600 pounds per square).
Clay is less porous than concrete but still absorbs some water. The glaze can wear off over time, exposing porous clay underneath. Clay can crack from freeze-thaw cycles in cold climates. Lichen adheres aggressively to clay surfaces.
Slate Roof Tiles
Premium natural stone tiles. Last 100+ years—some slate roofs in Europe are 400+ years old. Expensive ($15-30+ per square foot just for materials). Heavy (800-1,200 pounds per square). Requires specialized installation.
Slate is stone—very durable but brittle. Can crack under foot traffic. Nail holes can corrode over time. Moss grows aggressively in slate’s crevices. Cleaning slate requires gentle methods—acid-based cleaners can damage some slate varieties.
The Damage You Can Do
Breaking Tiles
All it takes is one wrong step. Concrete tiles become brittle with UV exposure—step in the wrong spot and they crack. Clay tiles can crack if you put your weight in the middle instead of near the nails (where it’s supported). Slate cracks if you don’t distribute weight properly.
One broken tile might cost $50-150 to replace. But you often don’t know you broke it until the next rain reveals a leak. And then there’s water damage to the structure below.
Blasting Water Under Tiles
High-pressure water gets under the tile overlaps. Now water runs where it shouldn’t—on the underlayment, in the sheathing, potentially into your attic. Roof leaks are insidious. By the time you notice staining inside, you’ve got rot, mold, and structural damage.
Removing Surface Finish
Some tiles (especially clay) have a colored glaze or surface finish. Pressure washing wears this away. Concrete tiles with integral color can have the color layer worn off. Now your roof looks patchy and faded. Can’t be fixed without replacement.
Voiding Warranties
Many tile manufacturers specifically prohibit pressure washing in their warranty terms. Break a tile while pressure washing? Warranty void. Have a roof leak after pressure washing? Might be denied. Read the fine print before you start.
Creating Slip Hazards
Algae and lichen make tile roofs slippery. When you add water and cleaning chemicals, it’s like walking on ice. One slip and you’re falling off a roof—potentially fatal. Professionals take this seriously. DIYers often don’t understand the risk until it’s too late.
Equipment for Tile Roofs
Pressure Washer: DON’T USE IT
Seriously. If you’re cleaning a tile roof yourself, put the pressure washer away. It’s not the right tool. Use a pump sprayer or backpack sprayer instead. Low-pressure application is the only safe method.
Chemical Application
A 2-3 gallon pump sprayer works from a ladder. A backpack sprayer (4-5 gallons) gives more capacity and easier mobility. Either way, you’re applying chemicals at low pressure—just enough to coat the surface, not blast it.
Extension Wands
An 8-12 foot extension wand lets you reach more roof from the ladder without climbing up. This is safer—more time on the ladder, less time on the roof.
Ladders and Fall Protection
A sturdy extension ladder (28-40 foot depending on roof height). Ladder stabilizers (standoff brackets) protect the gutters and provide stability. Fall protection harness if you must get on the roof—which you shouldn’t.
Safety Equipment
Hard hat, non-slip boots, safety glasses, gloves. Roof boots with soft soles for traction if you must walk on tiles. A roof walker (a foam mat that distributes weight) reduces breakage.
Chemical Selection
Standard Tile Roof Mix
For most tile roofs: 2-3% sodium hypochlorite (SH) with surfactant. That’s 24-36 ounces of 12.5% SH per gallon of water, plus 2-3 ounces surfactant.
The SH kills algae, mold, and lichen. Surfactant helps it stick to vertical tile surfaces and penetrate growth. For heavy lichen, you might need 3-4% SH and extra surfactant.
What NOT to Use
No pressure washing. No high-pressure application. No surface cleaners on roofs. No harsh acids (muriatic, hydrochloric) on tiles—they damage the surface. No solvent-based cleaners.
Plant-Safe Considerations
Roof runoff goes somewhere—usually onto your landscaping or your neighbor’s. SH at 2-3% kills plants on contact. You need to protect everything below with tarps and pre-saturation.
Some professionals use a post-treatment rinse with a neutralizing agent (like sodium thiosulfate) to break down residual SH before it runs off. This adds cost but saves landscaping.
Preparation
Protect Surfaces Below
Cover all landscaping with tarps. Pre-saturate plants with water before covering—saturated plants resist chemical damage better. Cover siding, windows, and anything else runoff might contact.
Clear the Area
Remove patio furniture, potted plants, toys, anything that could be damaged by runoff. Move cars—chemicals spot paint.
Ladder Setup
Set up ladders with stabilizers. Place on firm, level ground. Extend at least 3 feet above the roof edge for safe access. Inspect ladder for damage before use.
Weather Check
Overcast skies, 60-75°F, low wind, no rain for 4+ hours after cleaning. Avoid midday sun—chemicals dry too fast. Never clean in rain or when rain is imminent.
The Cleaning Process
Step 1: Apply Chemicals
Starting at the peak and working down, apply your SH mix with pump sprayer or backpack sprayer. You want visible coverage on all tiles—coated but not dripping heavily.
Work from ladders or from the ground if possible. Use extension wands to reach higher areas. Only get on the roof if absolutely necessary.
Step 2: Let It Dwell
Standard cleaning: 15-20 minutes dwell. Heavy lichen: 25-30 minutes. The chemicals are killing growth and penetrating deep into lichen and algae.
Don’t let it dry—if it’s hot or sunny, mist occasionally with water. Dry chemicals don’t work.
Step 3: Light Rinse (Optional)
For most tile roofs, you don’t rinse—the chemicals break down harmlessly and rain rinses over time. This prevents you from getting on the roof unnecessarily.
If you do rinse, use garden hose pressure only. No pressure washer. Rinse from the peak downward, being careful not to spray under the tiles. The goal is to remove dead growth and chemical residue, not to blast the surface.
Step 4: Inspect and Spot-Treat
After dwell (and optional rinse), look for areas where growth persists. Lichen especially might need a second application. Re-apply chemical to problem spots and let dwell another 15-20 minutes.
If You Must Walk on the Roof
Ideally, you clean tile roofs without ever stepping on them. Work from ladders, use extension wands, apply from the ground if possible. But sometimes you need to get on the roof.
Walking on Concrete Tiles
Concrete tiles are strongest near where they’re nailed—typically the top third of the tile. Step only there. Distribute your weight evenly—walk on the balls of your feet, not heels. Never step in the middle of a tile—that’s where they break.
Use a roof walker (foam mat) to distribute your weight. It reduces point loading and prevents breakage. Move slowly and deliberately.
Walking on Clay Tiles
Clay tiles are often hung on strips, not nailed every row. This means only some tiles have solid nail backing. You need to know which tiles can support weight—often the tiles at the ridges, hips, and nail courses.
If you don’t know what you’re doing, don’t walk on clay tile. Hire a pro.
Walking on Slate
Slate is brittle and cracks easily. Slate roofs are installed with hooks or nails, but the slate itself can’t handle concentrated weight. Professionals use roof ladders (structures that distribute weight across multiple slates).
DIYers shouldn’t walk on slate. Period.
General Rules
- Work early morning when roof is cool—hot tiles are more fragile and you’re more prone to slipping.
- Wear soft-soled boots designed for roofing.
- Never step on tiles that look cracked, damaged, or loose.
- Distribute weight—use roof walkers or crawl boards.
- Move slowly—one slip is fatal.
- Consider hiring a pro if you’re not 100% confident.
After Cleaning
Protect Landscaping
Remove tarps carefully without dumping collected chemicals onto plants. Rinse landscaping thoroughly with plain water to remove any chemical residue. Water daily for 1-2 weeks to flush any residual chemicals from soil.
Inspect the Roof
Look for broken or cracked tiles. Check for displaced tiles. Note any areas where cleaning wasn’t complete. Take photos for your records.
Schedule Maintenance
Tile roofs should be cleaned every 2-3 years in most climates. Annually in humid, shaded areas. Regular cleaning prevents deep lichen penetration and extends roof life.
Common Problems and Solutions
Tiles Broke During Cleaning
You stepped wrong or used too much pressure. Replacement is the only fix. Hire a professional roofer—tile replacement requires matching materials and proper installation techniques.
Lichen Didn’t Come Off
Lichen is stubborn—it penetrates deep into tile surfaces. First application might not get it all. Re-apply at higher concentration (3-4% SH) with extra surfactant. Let dwell longer (30 minutes). Might need physical removal with soft brush from ladder—carefully.
Roof Leaking After Cleaning
Water got under tiles during cleaning. You’ve got a problem. Inspect from attic if possible—look for wet spots on underlayment. Call a professional roofer. Might need tile removal and underlayment repair. Expensive lesson.
Plants Died from Runoff
Chemical runoff killed landscaping. Flush soil with large amounts of water daily for 2 weeks. Some plants might recover, some won’t. Replace dead plants. Next time: better tarps, more pre-saturation, consider neutralizing rinse.
Roof Looks Patchy
Uneven cleaning or some areas got more chemical than others. Re-apply chemical to problem areas, let dwell, re-rinse if needed. Patchiness usually fades over weeks as remaining growth dies and weathers off.
Pro Tips
Work from Ladders, Not Roof
Most tile roofs can be cleaned from ladders with extension wands. It’s slower but safer. Only get on the roof if absolutely necessary.
Use Roof Walkers
If you must walk on tiles, invest in a roof walker (foam mat that distributes weight). It’s $100-200 but prevents thousands in broken tiles.
Don’t Rinse Unless Necessary
Chemicals break down harmlessly. Rain rinses over time. Avoiding the rinse step means you avoid getting on the roof for that step. Most tile roof cleaning is chemical application only.
Hire a Pro for High-End Roofs
Slate and high-end clay roofs are too expensive to risk DIY. Professional roof cleaning: $300-800 for typical home, $1,000+ for large or complex roofs. Worth every penny in peace of mind.
Take Photos Before and After
Document the roof condition before cleaning. If tiles break during cleaning, you have proof they weren’t broken before. Useful for warranty claims and insurance.
DIY vs. Hiring a Pro
For tile roofs, professional cleaning is strongly recommended. The risks are high and the cost of mistakes is astronomical.
Professional tile roof cleaning: $300-1,000 depending on size, pitch, and accessibility. Includes chemicals, equipment, insurance, and expertise. Most guarantee their work.
DIY costs: $150-300 in chemicals (SH, surfactant, tarps). Equipment rental (ladders, sprayers): $100-200/day. Time: 6-12 hours for typical home.
Risk: Breaking tiles ($50-150 each to replace), causing roof leaks (thousands in damage), voiding warranty, personal injury (fall risk). Is it worth saving $200-400 to risk $5,000-20,000 in damage?
For most homeowners, the answer is no. Hire a pro.
Maintenance
Inspect tile roofs annually from the ground (binoculars help). Look for cracked, broken, or displaced tiles. Check for excessive debris accumulation. Note algae and lichen growth.
Clean every 2-3 years. Annually in humid, shaded climates. Trim overhanging branches to reduce debris and shade. Keep gutters clean—water backup under tiles causes damage.
Address broken tiles immediately. One broken tile can let water in and cause widespread damage. Fix small problems before they become big ones.
Next Steps
Was this article helpful?
Your feedback helps us improve our content.
Related Articles
Roof Cleaning 101: ARMA Guidelines and Best Practices
Master the fundamentals of safe roof cleaning. Learn ARMA guidelines, types of roof contamination, chemical selection by material, safety protocols, and pricing strategies for professional contractors.
Removing Black Streaks from Asphalt Shingles: The Complete Guide
Learn how to safely remove black algae streaks from asphalt shingles using soft wash techniques. Understand root causes, proper chemical concentrations, and application methods that protect your roof.