
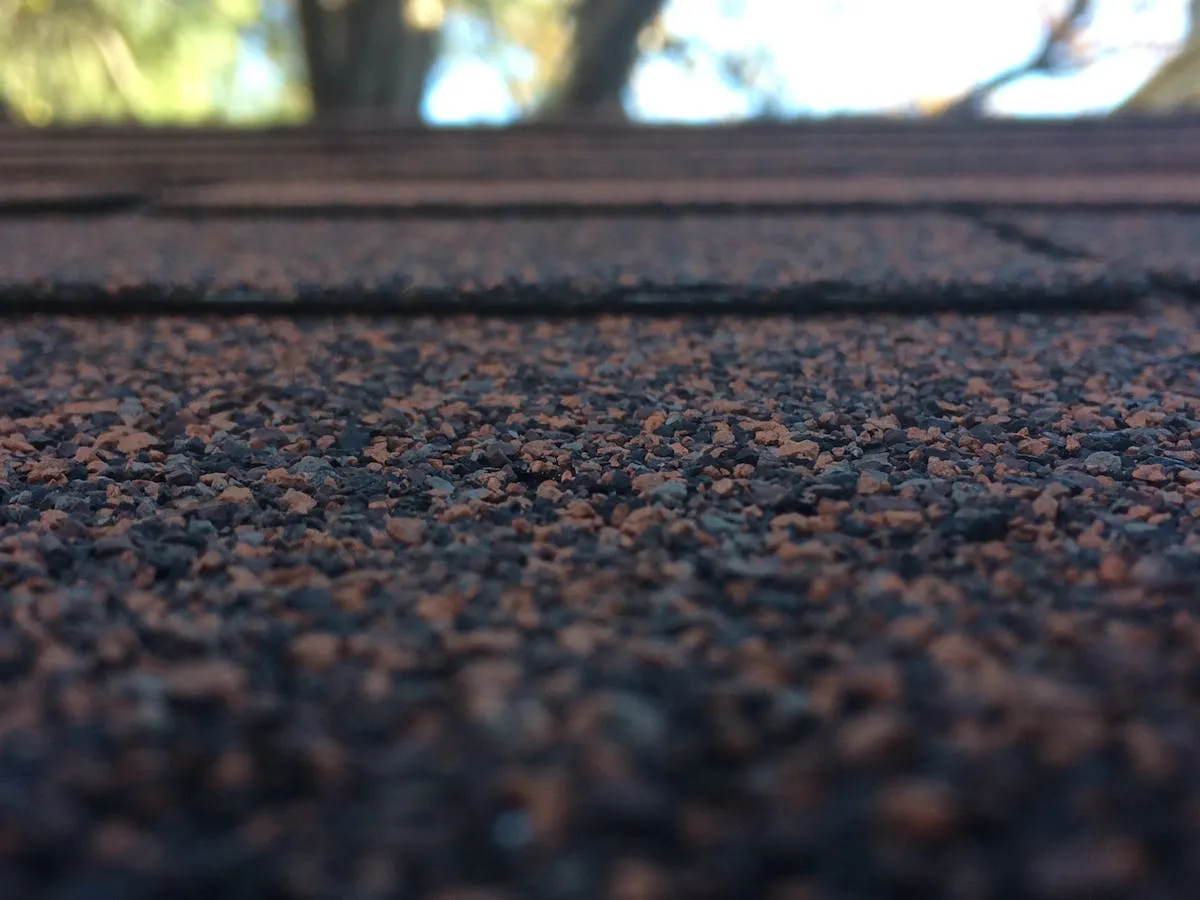
Roof Cleaning: Complete Guide to Safe Roof Algae and Moss Removal
Safe roof cleaning: remove black streaks, algae, and moss without damaging shingles. Proper techniques, chemical ratios, and safety precautions for roof cleaning.
Key Takeaways
- Fall risk is real – Roof cleaning is the most dangerous pressure washing task
- Never walk on wet roofs – Slippery, dangerous, and damages shingles
- Soft washing only – Pressure damages shingles and voids warranties
- AR-based cleaners beat bleach – Safer for you and your landscaping
- Work from ladders – Not the roof itself
Safety First: The Hard Truth
Roof cleaning is the most dangerous pressure washing task. Falls don’t discriminate. They happen to amateurs and professionals alike. It takes one slip, one gust of wind, one moment of lost balance. See our ladder safety guide and pressure washing safety guide for complete protocols.
Assess these honestly:
- Do you have fall protection experience?
- Do you have a certified harness system?
- Do you have someone spotting you?
- Is the weather ideal?
If you hesitate on any of these, stop and call a professional.
Work only if:
- You have roof work experience at heights
- You have a proper fall arrest system (harness, lanyard, anchor)
- Your roof pitch is under 6/12 (gentle slope)
- You have a spotter the entire time
- Weather is dry, calm, and clear
Don’t do it if:
- You’ve never worked at heights
- You don’t have certified fall protection gear
- Your roof is steep (6/12 pitch or more)
- You’re working alone
- Wind or rain is in the forecast
See the safety equipment guide for full protection requirements.
What’s Actually Growing on Your Roof
Black Streaks (Gloeocapsa Magma)
This is a cyanobacteria that feeds on limestone in shingle granules. It appears as long dark streaks running down the roof, usually on the north side where shade keeps surfaces damp. The algae holds moisture against shingles, eating away at them from underneath. Left untreated, it shortens roof lifespan.
Moss
Moss is thicker and more damaging than algae. It thrives in shade and moisture, typically growing on north-facing sides and under tree canopy. Moss has real roots that dig into shingles and lift them. Water penetration under lifted shingles causes serious roof damage and leaks.
Lichen
A fungus-algae combination that forms crusty patches—sometimes circular, sometimes spreading. Slower growing than moss but more stubborn. Lichen actually eats into shingles over time, causing permanent damage that can’t be repaired without replacing shingles.
Why it grows
Asphalt shingles are naturally vulnerable. They contain limestone filler and granules designed for protection, but the design traps debris. Debris plus shade plus humidity creates a farm for organic growth. Poor roof ventilation or overhanging trees accelerates the problem.
North-facing roof sections get less sun, stay damp longer, and accumulate growth fastest. These areas need priority attention.
The Real Risks
Falls are deadly. Working 20–30 feet up on a sloped wet surface with a ladder underneath creates multiple failure points. A slip, a gust of wind, a rung that wasn’t secured—any of these ends badly.
Roof damage is permanent. Pressure washing blasts away protective granules and can crack or break shingles. Water gets driven under shingles where it shouldn’t be. Most manufacturer warranties specifically exclude pressure washing.
Chemical runoff kills plants. Bleach-based solutions not rinsed completely poison landscaping. Years of growth can be lost to careless chemical application.
The Right Equipment
For the pressure washer:
- Keep PSI between 500–1,000 maximum. Low pressure with high volume (4+ GPM) is what works
- Use a downstream injector to apply chemicals while the machine stays on the ground
- No red or yellow nozzle tips. No surface cleaners. These are too aggressive for shingles
For your safety:
- A roof anchor system properly installed—not a chimney, not gutters, but a real anchor point rated for impact
- A full-body harness rated for fall arrest
- A lanyard (6 feet max) with a shock absorber
- Chemical-resistant gloves, a respirator for organic vapors, safety goggles, non-slip boots
- A helper on the ground. Non-negotiable
For your ladders:
- Extend at least 3 feet above the roofline
- Use a 4:1 angle (for every 4 feet up, 1 foot out from the wall)
- Lock the feet securely on level ground
- Use a stabilizer to protect gutters and keep the ladder from sliding
- Tie the ladder off to an anchor point if possible
Chemical Solutions That Actually Work
AR-Based Cleaners (Preferred Choice)
AR (ammonium salt-based) products like Spray & Forget or Wet & Forget are safer than bleach. They’re less corrosive, less toxic in fumes, and won’t wreck landscaping if rinsed properly. The trade-off is speed—you might need to reapply—but for most roof jobs, they’re the right choice. Mix and apply per product label directions.
Sodium Hypochlorite (When Heavy Growth Requires Firepower)
Standard bleach works for heavy contamination. A typical mix is 40–64 ounces of 12.5% SH in 5 gallons of water (roughly 5–8% concentration). Add surfactant—8–12 ounces—to keep the chemical on the vertical surface instead of running off immediately.
Use SH when AR products didn’t work, when you have heavy moss or lichen, and when you have proper runoff containment. It will damage plants and corrode metal if not handled carefully.
Without surfactant, your chemical runs off in seconds. With it, the mixture stays put and has time to work. Surfactant also creates visible foam showing coverage.
Before You Start: The Planning Phase
Walk the property. Check roof condition, age, and damage. Look for moss, algae, and lichen. Note obstacles like vents, skylights, and chimneys. If the roof is old, damaged, curling, or steep, stop—this isn’t a DIY job.
Protect everything below. Saturate landscaping with water before you start. Throw tarps over anything you don’t want chemicals on. Close windows. Move vehicles. Cover HVAC units. Saturate plants again during and after the job.
Check the forecast. Don’t clean if rain is coming. Wind is your enemy—it blows chemicals around and makes ladders dangerous. Clean on overcast days, 60–75°F if possible. Sun dries chemicals too fast. Clear skies for at least 4 hours after application.
Overcast, calm, 60–75°F, no rain expected for 4+ hours, and a spotter present.
The Process: How to Actually Do It
Step 1: Clear debris
Use a leaf blower from the ground to remove leaves and twigs. Clean gutters. If you see large moss patches or debris you can safely reach from a ladder, remove them by hand. Don’t walk on the roof.
Step 2: Spray the chemical
Start at the peak and work down. Overlap your passes like you’re painting. Create a visible foam so you can see where you’ve covered. Use a pump sprayer or a downstream injector with an extension wand. Work from the ladder. Move the ladder instead of walking the roof.
Step 3: Let it work
Chemical dwell time is where results happen. AR products typically need 30–60 minutes. SH needs 15–30 minutes. Heavy moss might need 45 minutes. Don’t let it dry completely, but don’t rinse too early either. This is when algae and moss roots die and start loosening.
Step 4: Rinse (maybe)
AR products often don’t need rinsing—rain will finish the job. But if you do rinse, start at the peak and work down. For SH, a thorough rinse is mandatory. You need to wash away every bit of bleach or it’ll damage plants below.
Step 5: Wait for results
The roof won’t look perfect immediately. Moss turns brown or white but stays attached for a while. Rain and wind loosen it over days or weeks. Visible improvement appears in 1–2 weeks, major improvement in a month. Full results might take 3–6 months depending on shade and humidity.
Results improve gradually. Don't expect perfection on day one. The second week shows real progress as dead growth loosens and washes away.
The Long Game: Keeping Roofs Clean
One treatment often isn’t enough. Heavy moss or lichen might need a second application 24–48 hours later. That’s normal.
Preventive treatments work. Every 1–2 years, apply a lighter chemical treatment before growth returns. It’s cheaper and easier than heavy restoration cleaning.
Maintenance prevents disaster. Trim branches so sun hits the roof. Clear gutters so water doesn’t pool. Good ventilation dries things out. Consider zinc or copper strips installed at the peak—they release ions that kill algae. These aren’t cheap, but they work for years.
When to Quit and Call a Pro
Hire a professional if:
- Your roof is steep (over 6/12 pitch)
- It’s a multi-story home
- You don’t have fall protection gear or experience
- Heavy moss or lichen covers large areas
- Your roof is old or damaged
- You’re working alone
Professional roof cleaning runs $500–1,500 depending on size and condition. They have insurance, trained crews, proper equipment, and the expertise to avoid damaging your roof. That’s worth it when you consider the injury risk and the cost of fixing a damaged roof.
Maintenance Schedule
Every few months: Look at your roof from the ground. Check gutters.
Once a year: Have someone inspect the roof professionally. Clean gutters. Check for storm damage. Plan preventive treatment.
As needed: After heavy storms, if you see new growth, or before selling your home.
Equipment and Setup
Equipment Requirements
Pressure Washer:
- LOW PRESSURE ONLY – 500–1,000 PSI maximum
- High volume – 4+ GPM preferred
- Chemical injector – Downstream injector required
- Long hoses – Reach entire roof from ground
PROHIBITED:
- No surface cleaners – Too aggressive
- No red/yellow tips – Will damage shingles
- No walking on roof – Work from ladders only
- No high pressure – Destroys roof
Essential Safety Equipment
Fall Protection:
- ROOF anchor system – Properly installed
- Full-body harness – Rated for fall arrest
- Lanyard – 6-foot maximum with shock absorber
- Ladder stabilizer – Secure ladder placement
Personal Protection:
- Safety goggles – Chemical splash protection
- Respirator – Half-face with organic vapor cartridges
- Gloves – Chemical-resistant (nitrile)
- Non-slip boots – Aggressive tread
- Helmet – Fall protection
Chemical Handling:
- Pump sprayer – 2–3 gallon capacity
- Backpack sprayer – For better reach
- Chemical-resistant containers – For mixing
Ladder Setup
Proper Ladder Placement:
- Extend 3 feet above roof edge
- Secure base – Level ground, lock feet
- Angle 4:1 – For every 4 feet up, 1 foot out
- Stabilizer – Protect gutters, secure ladder
- Tie off – Secure ladder to anchor point
Critical: Never work on roof alone. Always have a spotter at the base of the ladder.
Chemical Solutions
AR-Based Cleaners (Preferred)
What is AR?
- Sodium hypochlorite alternative – Ammonium salts
- Safer than SH – Less corrosive
- Effective – Kills algae and moss
- Plant-safe – When rinsed properly
Commercial AR Products:
- Spray & Forget – Popular homeowner product
- Wet & Forget – Similar formula
- Roof Reactor – Professional-grade
- Mix per directions – Each product differs
Pros:
- Safer for plants
- No chlorine smell
- Plant-safe when used correctly
- Longer dwell time for better cleaning
Cons:
- More expensive than SH
- Slower acting, may need multiple treatments
- Less effective on heavy moss
Sodium Hypochlorite (SH) Mix
Standard Roof Mix (5 Gallons):
- Water: 4+ gallons
- 12.5% SH: 40–64 ounces (5–8% mix)
- Surfactant: 8–12 ounces
- Stronger concentration for vertical application and heavy growth
WARNINGS:
- Stronger chemicals – More dangerous to handle
- Plant damage – Will kill landscaping
- Runoff toxic – Keep away from waterways
- Corrosive – Can damage metal flashing
When to Use SH:
- Heavy moss/lichen growth
- AR products failed
- Professional application
- Proper runoff containment available
Surfactants for Roofs
Why Needed:
- Vertical surface – Chemicals run off without surfactant
- Clinging action – Keeps chemicals on roof
- Penetration – Helps chemicals reach algae roots
- Visual indicator – Foam shows coverage
Recommended Surfactants:
- Roof-specific surfactants – Designed for roof cleaning
- House wash surfactants – Work well
- Dish soap – Weak alternative, not recommended
Amount:
- 6–12 ounces per 5 gallons – Follow product directions
- More for steep roofs – Prevents runoff
- More for heavy growth – Better penetration
Preparation: Critical Step
Site Assessment
Before You Begin:
Inspect Roof:
- Identify surface type – Asphalt shingles, metal, tile
- Check condition – Age, damage, granule loss
- Locate contaminants – Algae, moss, lichen
- Note obstacles – Vents, skylights, chimneys
STOP IF:
- Roof is damaged – Curling, missing shingles
- Very old roof – Near end of lifespan (20+ years)
- Steep pitch – 6/12 or greater
- You’re unsure – When in doubt, don’t do it
Ground Preparation
Protect Landscaping:
- Water thoroughly – Saturate all plants
- Cover with tarps – Plastic sheeting
- Water during job – Keep plants hydrated
- Rinse thoroughly – After cleaning complete
Protect Property:
- Cover exterior walls – Prevent chemical stains
- Close windows – Prevent chemical entry
- Move vehicles – Away from house
- Cover HVAC units – Prevent damage
Safety Setup:
- Place ladders – Secure, stable placement
- Install fall protection – Proper anchor points
- Set up staging – Safe working areas
- Spotter ready – Person at base to assist
Weather Check
Ideal Conditions:
- Overcast – Prevents rapid drying
- 60–75°F – Chemicals work well
- Low wind – Prevents drift, ladder stability
- No rain expected – For 4+ hours
DO NOT CLEAN:
- Windy days – Ladder instability, chemical drift
- Rain approaching – Wastes chemicals, dangerous ladders
- Freezing temps – Chemicals don’t work, ice hazard
- Direct sun – Chemicals dry too fast
The Cleaning Process: Step-by-Step
Step 1: Remove Debris
From the Ground:
- Use leaf blower – Remove loose debris
- Clean gutters – Remove leaves, sticks
- Trim branches – If touching roof
- Remove large moss – By hand (from ladder)
Safety:
- Never walk on roof – Work from ladders only
- Use extension poles – For reach
- Watch for falling debris – Protect people below
Step 2: Apply Chemicals
Using Pump Sprayer (Preferred):
Application Pattern:
- Start at peak – Highest point
- Work down – Apply in vertical pattern
- Overlap passes – Ensure complete coverage
- Create visible foam – Surfactant shows coverage
- Work from ladders – Move ladder, don’t walk roof
Technique:
- Spray upward – From eave toward peak
- Even coverage – Don’t miss spots
- Heavy application – On problem areas
- Extend wand – For better reach
Using Downstream Injector:
- Fill bucket – With AR or SH mix
- Install black soap nozzle
- Apply from ground – If possible
- Or from ladder – With extension wand
- Same pattern – Top to bottom, overlap
Step 3: Extended Dwell Time
Roof Cleaning Needs Patience:
Typical Dwell Times:
- AR cleaners: 30–60 minutes
- SH mixes: 15–30 minutes
- Heavy moss: 30–45 minutes
- North side: Longer dwell (shadier)
What’s Happening:
- Chemicals are killing algae/moss
- Roots are dying at shingle level
- Growth is loosening from surface
- Stains are breaking down
Critical Rules:
- Don’t let dry completely – Reduced effectiveness
- Mist if needed – Light water spray if drying
- Avoid direct sun – Heat accelerates drying
- Watch weather – Wind dries faster
Step 4: The Rinse (Optional)
AR Cleaners:
- Often no rinse needed – Rain completes cleaning
- Rinse if desired – After 60 minutes dwell
- Light rinse only – Don’t wash away cleaner
SH Mixes:
- Thorough rinse required – Leftover SH damages plants
- Start at peak – Work downward
- Rinse until clear – No suds or foam
- Multiple passes – Better safe than sorry
Safety During Rinse:
- Roof becomes EXTREMELY slippery when wet
- Never walk on wet roof
- Work from ladders – Or ground
- Watch runoff – Don’t stand in chemical stream
Step 5: Second Application (If Needed)
When Needed:
- Heavy moss/lichen
- First treatment insufficient
- Professional results required
Process:
- Let roof dry – 24–48 hours
- Reapply chemical – Same mix
- Dwell again – Same time frame
- Rinse if SH – AR may not need rinse
Results: Multiple treatments often needed for heavy growth.
Post-Cleaning: What to Expect
Immediate Results
What You’ll See:
- Cleaner appearance – Black streaks reduced/gone
- Moss turned brown/white – Dying but attached
- Some improvement – Rarely perfect immediately
What to Expect:
- Gradual improvement – Over weeks/months
- Rain helps – Naturally rinses dead moss
- Wind helps – Blows away loose growth
- Patience required – Full results take time
Long-Term Results
Timeline:
- 1–2 weeks – Noticeable improvement
- 1–2 months – Major improvement
- 3–6 months – Full results (no regrowth)
Factors Affecting Results:
- Shade – More shade = slower improvement
- Humidity – More humidity = slower results
- Ventilation – Poor ventilation = slower drying
- Tree coverage – More debris = faster regrowth
Prevention
Reduce Future Growth:
- Trim branches – Increase sunlight
- Improve ventilation – Reduce moisture
- Install zinc/copper strips – Prevent algae growth
- Clean gutters – Prevent debris accumulation
- Apply preventive treatments – Every 1–2 years
Common Problems and Solutions
Problem: Moss Still Attached After Treatment
Cause: Moss roots deeply embedded
Solution:
- Wait – Rain and wind will loosen it
- Second treatment – May be necessary
- Manual removal – From ladder with scraper (dangerous)
- Accept it – Some moss may be permanent
Problem: Rapid Regrowth
Cause: Root causes not addressed
Solution:
- Trim trees – Increase sunlight
- Improve ventilation – Reduce moisture
- Clean gutters – Reduce debris
- Preventive treatments – Every 1–2 years
- Install preventive strips – Zinc or copper
Problem: Plant Damage
Prevention:
- Saturate plants – Before, during, after
- Cover landscaping – With tarps
- Contain runoff – Don’t let chemicals pool
- Rinse thoroughly – After treatment
If Damage Occurs:
- Flush with water – Immediately
- Daily watering – For 1–2 weeks
- Replace plants – Some won’t recover
Pro Tips for Safer, Better Results
Tip 1: Use AR Products First
Why:
- Safer for you – Less toxic fumes
- Safer for plants – Less damage risk
- Plant-safe – When rinsed properly
- Longer dwell – Better cleaning
Only Use SH If:
- AR products failed
- Heavy moss/lichen
- Professional application
- Proper containment available
Tip 2: Never Walk on Roof
Why:
- Extremely dangerous – Slippery, sloped, high
- Damages shingles – Granule loss
- Not necessary – Can clean from ladders
- Professionals don’t walk – They use lifts or long poles
Alternative:
- Work from ladders – Move ladder as needed
- Use extension poles – For reach
- Consider lift rental – For large roofs
- Hire professional – With proper equipment
Tip 3: Treat Preventively
Before Growth Returns:
- Every 1–2 years – Before visible growth
- Lighter application – Preventive strength
- Cheaper – Than heavy restoration
- Extends roof life – Prevents damage
Tip 4: Install Preventive Measures
Zinc or Copper Strips:
- Install at peak – Metal strips under cap shingles
- Rain washes ions – Prevents algae growth
- Lasts years – Long-term prevention
- Professional installation – Recommended
Trim Trees:
- Increase sunlight – Reduces growth
- Reduce debris – Less food for algae
- Improve drying – Less moisture retention
When to Hire a Professional
Consider Professional If:
Safety Concerns:
- Steep roof pitch – 6/12 or greater
- Multi-story home – Working at extreme heights
- No experience – At heights or roof cleaning
- No safety equipment – Fall protection, training
- Working alone – Always need a spotter
Roof Concerns:
- Extensive moss/lichen – Difficult DIY
- Old/damaged roof – Higher risk of damage
- Complex roof – Multiple levels, skylights, valleys
- Metal or tile roof – Different techniques required
Results Matter:
- Special event – Wedding, party coming up
- Selling home – Curb appeal critical
- Perfection required – Pros have experience and equipment
- Warranty concerns – Some require professional cleaning
Professional Cost vs. DIY
Professional Roof Cleaning:
- Typical cost: $500–1,500
- Includes: Chemicals, equipment, expertise, insurance
- Time: 2–6 hours
- Safety: Professionals have training and equipment
DIY Cost:
- Equipment rental: $100–300 (lift, safety gear)
- Chemicals: $50–150
- Time: 6–10 hours
- Risk: Serious injury or death possible
Bottom Line: Roof cleaning is one of the most dangerous DIY projects. The risk-to-reward ratio strongly favors hiring a professional.
Next Steps
Ready to move forward?
Remember: Roof cleaning is extremely dangerous. When in doubt, hire a professional.
Was this article helpful?
Your feedback helps us improve our content.
Related Articles

Soft Washing Technique: Complete Method and Flow
Master soft washing: low-pressure cleaning with chemical pretreatment. The safe method for roofs, siding, and delicate surfaces.
House Wash Mix Recipes: Professional Ratios for Every Surface
Exact pressure washing chemical mix recipes: SH concentrations, surfactant ratios, and application methods for vinyl siding, stucco, brick, and more.
Pressure Washing Safety: Essential Rules Every Operator Must Follow
Critical pressure washing safety rules: PPE, electrical hazards, ladder safety, and chemical handling. Prevent injuries and protect property.