
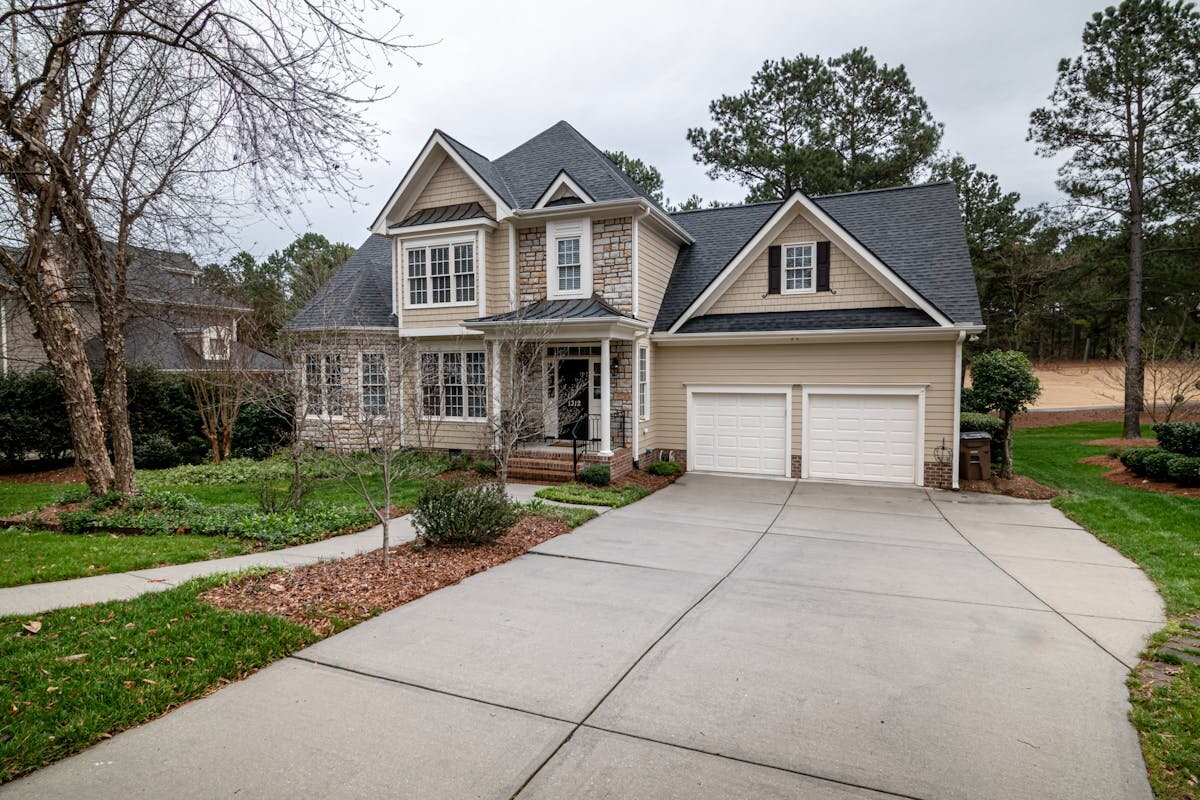
Concrete Driveway Cleaning Guide: Remove Oil Stains, Tire Marks, and Algae
Professional concrete driveway cleaning techniques. Remove oil stains, tire marks, algae, and grime. Surface sealing, restoration, and long-term protection strategies.
Concrete Driveway Cleaning Guide
A clean driveway improves curb appeal and protects the concrete. Getting it right depends on knowing your surface, choosing the right chemicals and equipment, and using techniques that remove stains without causing damage.
Understanding Your Surface
Concrete is porous. Water, oil, road salts, and organic stains (mold, algae, leaf tannins) soak deep into the material. Surface-level cleaning alone won’t solve the problem. Effective driveway cleaning requires breaking down or extracting what has been absorbed.
Different concrete finishes respond differently to cleaning methods:
- Broom finish (most common): Textured surface for traction
- Exposed aggregate: Decorative stones embedded in the surface
- Stamped or colored: Decorative patterns applied during pouring
- Smooth troweled: Dense, less porous finish
Knowing which finish you have helps determine the right approach and avoid damage.
Essential Equipment
A quality surface cleaner cleans 10-20 times faster than hand wand work and eliminates streaking for consistent results across the entire surface.
Surface Cleaner
A surface cleaner is the most efficient tool for driveway cleaning. Quality units cost $200–600 and last for years of regular use. Select an 18–20” model for residential driveways; larger properties benefit from 24–28” models.
The key to surface cleaner success is steady, deliberate movement. Walk at a consistent pace, overlap each pass 2–3 inches, and avoid tilting or pressing down—let the machine do the work. Match the surface cleaner GPM rating to your pressure washer’s output.
For detailed guidance, see the Surface Cleaner Technique Guide.
Wand Work
Wands handle edges, tight spaces, pretreatment, and smaller areas that the surface cleaner can’t reach. Nozzle selection matters: green 25° for general cleaning, yellow 15° for heavy stains, and white 40° for rinsing. Hold the wand 6–12 inches from the surface with 50% overlap on each pass, keeping it moving constantly.
Learn proper wand technique to avoid streaking and uneven results.
Chemical Solutions
Standard recipes scale to match typical driveway cleaning scenarios:
Light Cleaning
For light dirt, grime, and algae growth:
- 4.5 gallons water
- 16 oz sodium hypochlorite (12.5%)
- 4–6 oz surfactant
Pre-wet the surface, apply the solution, allow 5–10 minutes dwell time, clean with the surface cleaner or wand, then rinse thoroughly.
Heavy Degreasing
For tire marks, oil stains, heavy grime, and exhaust buildup:
- 4 gallons water
- 32 oz sodium hypochlorite
- 6–8 oz surfactant
- 8–12 oz butyl degreaser
Apply the mixture, scrub with a stiff brush, dwell 10–15 minutes, clean, and rinse thoroughly.
Rust and Mineral Deposits
For rust staining:
- 4–8 oz oxalic acid per gallon water
Apply, allow 15–20 minutes dwell, scrub gently, rinse, and neutralize with a baking soda solution.
Always wear protective equipment including gloves, eye protection, and long sleeves. Ensure proper ventilation and never mix chemicals. Certain combinations create toxic fumes.
Stain Types and Treatment Strategies
Fresh Oil Stains
Immediate action prevents deeper absorption. Apply degreaser, scrub with a stiff brush, allow 10–15 minutes dwell time, and clean thoroughly.
Old Oil Stains
Established oil stains require more aggressive treatment. Use a poultice method: apply degreaser, cover with plastic sheeting, and allow 1–2 hours for deep penetration. Enzymatic cleaners can improve results. Accept that deeply embedded stains may resist complete removal. Heat accelerates drying and improves extraction—old stains often come out more easily on warm days.
Tire Marks
Combine sodium hypochlorite with degreaser. Aggressive scrubbing with a stiff brush followed by surface cleaning typically requires multiple passes. Regular cleaning prevents heavy buildup that becomes difficult to remove.
Efflorescence (White Mineral Deposits)
A mild acid wash using oxalic acid or specialized mineral deposit remover works best. Full PPE is essential. Neutralize thoroughly with a baking soda solution after rinsing.
Tannin Stains from Leaves
Leaf debris creates persistent stains that require a stronger approach:
- Stronger sodium hypochlorite mix (0.5–0.75%)
- Extended dwell time (15–20 minutes)
- Light scrubbing
- Surface cleaning
Regular removal of leaves and debris prevents tannin staining from developing in the first place.
The Cleaning Process
Preparation
Clear the driveway completely—move vehicles, toys, and furniture to the side. Sweep loose debris. Walk the surface and identify stains that will need pretreatment. Protect landscaping and siding at the edges. Plan where runoff will flow and take steps to contain it.
Stain Pretreatment
Apply degreaser or sodium hypochlorite directly to oil stains, tire marks, or heavily soiled areas. Scrub with a stiff brush. Allow the chemical to dwell while setting up the rest of your equipment. Never let the pre-treatment dry completely—it loses effectiveness.
Apply Main Cleaner
Use a downstream injector (black nozzle) to introduce cleaner at the surface cleaner head, or use a pump sprayer for smaller areas where more control is needed. Work in organized sections. Maintain even coverage across the entire section. Don’t allow the chemical to dry before cleaning.
Surface Cleaning
Start at a corner and walk at a steady pace. Overlap each pass 2–3 inches. Don’t tilt the surface cleaner or apply downward pressure—the machine applies the right force. Work in organized sections, keeping edges wet as you move across the driveway.
Edge Work
Switch to a wand with a green nozzle once the main surface is clean. Finish the edges the surface cleaner couldn’t reach, tight spaces around the garage, foundation lines, and corners. This step eliminates visible lines between cleaned and uncleaned areas.
Final Rinse
Use a white nozzle and make multiple light passes across the entire surface. Push water away from structures. Ensure no chemical residue remains. Check for missed spots during the final rinse—they’re easiest to catch before the surface dries.
Sealing for Protection
Sealing protects against future stains, makes future cleaning easier, improves appearance, and extends concrete life. Wait 24–48 hours after cleaning for the concrete to dry completely. Ideal conditions are 60–80°F. Avoid rain for at least 24 hours after sealing.
Acrylic Sealer
The most common choice:
- Easy application
- Produces a wet appearance
- Lasts 1–3 years
- Costs $80–150 for a typical 2-car driveway
Epoxy Sealer
For high-traffic areas and garage floors:
- Exceptionally durable (3–7 years)
- More difficult to apply
- Costs $200–500 for a 2-car garage
- Professional application recommended
Penetrating Sealer
For a natural appearance:
- Invisible when applied
- Lasts 2–5 years
- No color change
- Costs $120–250 per driveway
Apply with a roller or sprayer in small sections. Maintain a wet edge to avoid lap marks. Avoid puddles. Let dry 24–48 hours before allowing traffic.
Regular sealing every 2–3 years costs $100–250 but prevents stain absorption, makes future cleaning faster, and can extend driveway life by years—far cheaper than replacement at $4,000–12,000.
Common Problems and Solutions
White Haze on the Surface
This indicates chemical residue that wasn’t fully rinsed. Use additional white nozzle passes, light scrubbing, or a light acid wash in severe cases to remove it.
Sealer Peeling or Flaking
Usually caused by sealing damp concrete or using an incompatible sealer product. Strip the failed sealer, re-clean the surface, and re-seal with a compatible product. Always ensure concrete is fully dry before applying sealer.
Oil Stains Return Quickly
Concrete is porous and absorbed the oil deep into the surface. More aggressive degreasing is needed. Poultice treatment works well for deep stains. Seal after cleaning to prevent future oil absorption.
Spalling (Concrete Flaking)
This results from freeze-thaw cycles, excessive pressure (often from yellow nozzles), or chemical damage. Avoid high-pressure nozzles on damaged areas. Seal to prevent water intrusion. Minor spalling responds to patch products; major damage requires professional repair.
Environmental and Safety Considerations
Runoff and Environmental Protection
Chemicals and contaminants wash somewhere. Don’t allow runoff to enter storm drains—this is illegal in many jurisdictions. Never wash directly into waterways. Contain runoff when possible using absorbent socks or berms. Choose biodegradable chemicals when available. Diverting water to landscaping is another responsible option.
Slip Hazard
Wet concrete becomes extremely slippery. Wear slip-resistant shoes during the entire job. The surface can remain slippery for days after cleaning. Alert family members about the hazard.
Always follow chemical manufacturer instructions. Wear full protective equipment including gloves, eye protection, and respiratory protection if needed. Never mix chemicals without understanding the results.
When to Hire a Professional
DIY driveway cleaning works well for small to medium properties, but certain situations benefit from professional expertise:
- Large areas (1,000+ square feet)
- Heavy staining requiring multiple treatments
- Delicate concrete (stamped, colored, or decorative)
- Structural concerns (deep cracks, significant spalling)
- Difficult stains requiring heat or specialized equipment
- Sealing large areas where consistency is critical
Professionals typically have:
- Hot water units for more effective cleaning
- Larger surface cleaners
- Water recovery and reclaim systems
- Extensive experience with problem stains
Professional Pricing Guidelines:
Basic cleaning (large areas): $400–600+
With stain removal:
- Light stains: +$50–100
- Heavy stains: +$100–200
- Multiple treatments: +$150–300
With sealing:
- Cleaning + sealing: $350–600
- Premium sealer: +$100–200
- Multiple coats: +$50–100 per coat
Maintenance Schedule
Recommended Cleaning Frequency
- Annual: Most driveways, especially in climates with regular rainfall
- Semi-annual: Shaded areas and humid climates where algae grows quickly
- Bi-annual: Full sun exposure in dry climates with less frequent rainfall
Preventive Maintenance
- Remove leaves and debris regularly to prevent tannin staining
- Clean oil spills immediately (absorb with kitty litter, then clean)
- Re-seal every 1–3 years depending on sealer type and wear patterns
- Address cracks promptly to prevent water intrusion and spreading damage
The single most effective investment for long-term driveway health is regular sealing. Sealed concrete resists staining, cleans more easily, and lasts significantly longer than unsealed concrete. The modest cost of sealing ($100–250 every 2–3 years) is minimal compared to full driveway replacement ($4,000–12,000).
Was this article helpful?
Your feedback helps us improve our content.
Related Articles
Spot Cleaning Guide: Targeted Stain Removal Techniques
Remove specific stains: oil, rust, grease, algae spots, tannin stains. Targeted cleaning without full surface treatment.
Equipment Buying Guide: Choose the Right Pressure Washer
Select the best pressure washer: gas vs electric, GPM vs PSI, features, and brands. Professional buying recommendations.

Pressure Washer Wand Techniques: Mastering Spray Patterns and Distance
Master pressure washer wand control: spray patterns, distance control, trigger technique, and efficient cleaning methods for all surfaces.