
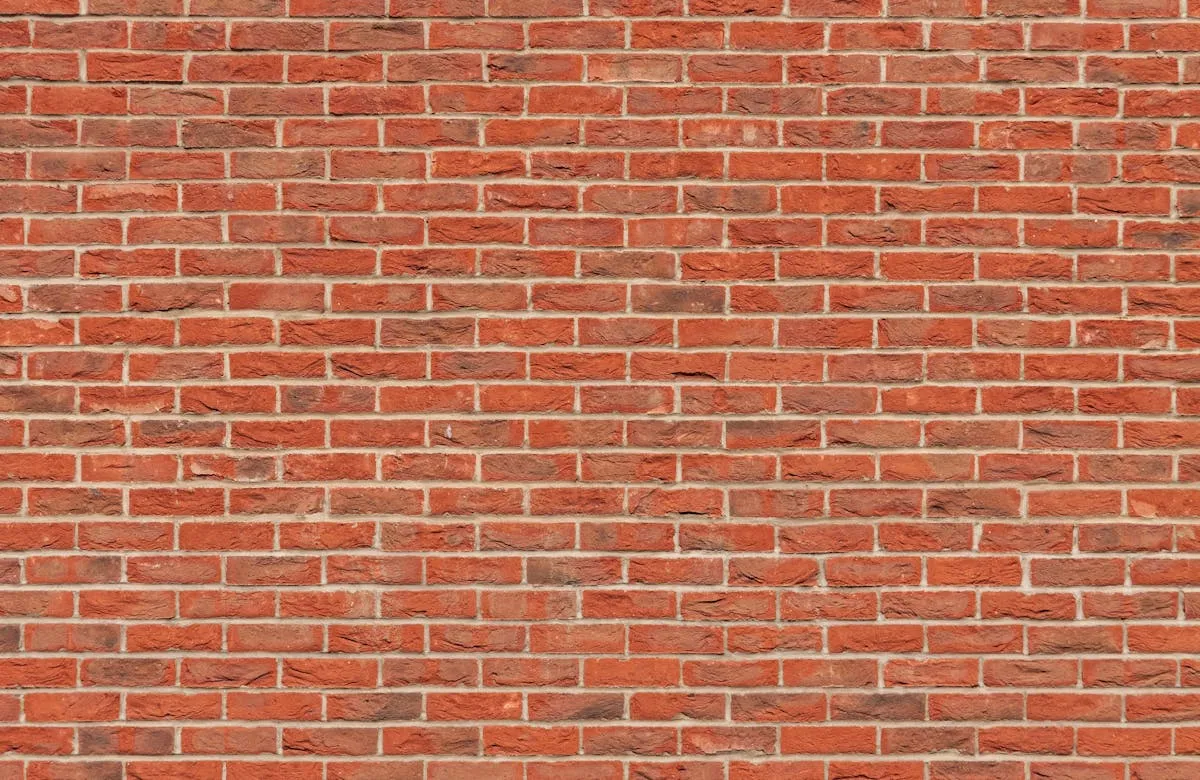
Brick Exterior Washing: Mortar-Safe Techniques and Efflorescence Removal
Complete guide to cleaning brick exterior walls: mortar-safe techniques, efflorescence removal, avoiding sandblasting damage, and proper pressure washing methods.
Quick Answer
Clean brick at 1500-2500 PSI using 25-degree nozzle, spraying at 45-degree angle. Pre-treat with brick-safe cleaner (alkaline detergent or masonry cleaner). Never use 0-degree nozzle or sandblast—both damage mortar and brick face. For efflorescence (white deposits), use efflorescence remover or vinegar solution before general cleaning.
Key Takeaways
- Mortar is the weak point - Softer than brick, erodes from high pressure or wrong chemicals
- Never use 0-degree nozzle - Concentrated stream cuts mortar lines like butter
- Efflorescence requires pre-treatment - White salt deposits won’t rinse off, need chemical removal
- Avoid sandblasting - Damages brick surface permanently, harder to clean afterward
- Seal after cleaning - Prevents future efflorescence and staining
Understanding Brick Exteriors
Brick is durable—lasts centuries—but it’s not indestructible. The mortar joints between bricks are the weak point. Mortar is softer, more porous, more vulnerable to erosion than brick itself. When cleaning brick, protecting mortar is your primary concern.
Brick faces vary by type:
Red clay brick: Most common, relatively soft, can be damaged by high pressure or sandblasting.
Face brick: Harder, denser, manufactured specifically for appearance. More durable but still requires care.
Antique/reclaimed brick: Often softer than modern brick, varies greatly in hardness. Test cleaning method on small area first.
Glazed brick: Smooth, glossy finish. Can be etched by acidic cleaners—test first.
Brick is porous—absorbs water and stains easily. Pressure washing opens pores and exposes fresh brick that absorbs stains faster unless sealed afterward.
REPLACECRITICAL: Mortar damage is permanent. Once mortar is eroded, repointing (replacing mortar) is the only fix. Repointing costs $5-20 per sq ft depending on accessibility. Protect mortar during cleaning—it’s cheaper than replacing it.
The Mortar Problem
Why Mortar Fails First
Mortar is cement, sand, and lime mixture—softer and more porous than brick. It’s designed to be the sacrificial layer. Mortar absorbs moisture, flexes with thermal expansion, takes the stress so brick doesn’t have to.
But this means mortar erodes faster. High pressure, concentrated spray, wrong chemicals, abrasive cleaning—all attack mortar first. Once mortar is eroded:
- Water penetrates behind brick
- Freeze/thaw cycles cause spalling
- Structural integrity compromised
- Expensive repointing required
Mortar Erosion Signs
Recessed mortar joints: Mortar lower than brick face. Indicates erosion. Moderate erosion (1/8 inch recess) is normal after decades. Severe erosion (1/4 inch or more) needs repointing.
Crumbly mortar: Pinch mortar between fingers—if it crumbles easily, it’s failing. Needs repointing before cleaning.
Missing mortar: Voids where mortar completely washed out. Immediate repointing required.
Hollow sound: Tap gently—hollow sound indicates mortar separated from brick. Repointing needed.
When to Repoint Before Cleaning
If mortar shows any of above signs, repoint before cleaning. Pressure washing damaged mortar makes it worse, not better. Repointing means removing old mortar and replacing with new. Hire professional mason for large areas. Small areas can be DIY if you have experience.
Safe Pressure Washing Techniques
Equipment Setup
Pressure: 1500-2500 PSI. Most effective range is 2000 PSI. Below 1500 won’t clean well. Above 2500 risks mortar erosion.
Nozzle: 25-degree (green) is ideal. 15-degree (yellow) for stubborn areas if you keep distance and move fast. Never use 0-degree (red) or turbo nozzle—these cut mortar lines rapidly.
Technique: Spray at 45-degree angle to wall. Never perpendicular. Work from top to bottom when rinsing (opposite for chemical application). Overlap passes by 50%.
Distance Matters
Keep nozzle 6-12 inches from surface for general cleaning. For stubborn stains, you can move closer to 4-6 inches but ONLY if using 25-degree nozzle and moving constantly.
If you see mortar particles flying, you’re too close or using too narrow a nozzle. Back off immediately.
Direction of Spray
Don’t spray directly at mortar lines. Angle the spray so it hits brick face more directly than mortar. You can’t avoid mortar entirely, but you can minimize direct impact.
Spray with mortar lines, not across. Spray up/down or parallel to mortar lines, not perpendicular. Reduces cutting action on mortar.
Step-by-Step Process
1. Protect landscaping:
Cover plants, shrubs with plastic. Brick cleaners kill vegetation. Water thoroughly before and after to dilute runoff.
2. Close windows and doors:
Water gets inside quickly if you forget.
3. Apply cleaner (bottom to top):
Start at bottom, work up. This prevents streaking from cleaner running down dirty brick. Apply with garden sprayer.
4. Let dwell 15-20 minutes:
Cleaner needs time to break down dirt, grime, atmospheric staining. Don’t let it dry on surface—if drying too fast, mist with water.
5. Scrub if needed:
For heavy staining, textured brick, mold—scrub with stiff bristle brush. Don’t use wire brush or abrasive pads.
6. Pressure wash (top to bottom):
Rinse in opposite direction of application. Start at top, work down. Use proper pressure and nozzle.
7. Rinse thoroughly:
Keep rinsing until water runs completely clear. Leftover cleaner leaves residue.
8. Inspect when dry:
Wait 2-4 hours for brick to dry. Wet brick looks different than dry. Check for missed spots or mortar damage.
Efflorescence Treatment
What Is Efflorescence?
White powdery salt deposits on brick surface. Caused by water migrating through brick/mortar, dissolving salts, depositing on surface when water evaporates. Not harmful to structure but looks terrible and indicates moisture issues.
Removal Methods
Efflorescence removers: Acidic products specifically formulated to dissolve salts. Apply, let dwell 10-15 minutes, scrub lightly, rinse thoroughly. Follow directions exactly—some are strong acids.
Vinegar solution: 1:1 white vinegar:water. Mild acid, safe for most brick. Apply, let dwell 15 minutes, scrub, rinse. May need multiple applications for heavy efflorescence.
Muriatic acid: 10:1 water:acid ratio. Last resort for severe efflorescence. Strong acid—wear protection (goggles, gloves, respirator), rinse thoroughly. Never use on glazed or sealed brick.
Prevention
Reduce water sources: Fix roof leaks, improve drainage, ensure gutters work properly. Less water means less efflorescence.
Seal brick: Penetrating sealer repels water, prevents salt migration. Apply after cleaning, once brick is completely dry (48-72 hours).
Improve ventilation: Moisture escapes better with good airflow. Trim vegetation, clear vents.
Chemical Selection
Alkaline Detergents
Best for: General cleaning, atmospheric dirt, light grime
Examples: Simple Green, Purple Power, dedicated masonry cleaners
Mix: Typically 4:1 to 10:1 water:cleaner depending on product and severity
Application: Apply, let dwell 15-20 minutes, scrub if needed, rinse
Pros: Effective, relatively safe, inexpensive
Cons: Won’t remove efflorescence, can harm vegetation if not rinsed thoroughly
Acidic Cleaners
Best for: Efflorescence removal, hard water stains, mortar smears
Examples: Efflorescence removers, masonry acid cleaners, vinegar (mild)
Application: Apply, let dwell 10-15 minutes, scrub lightly, rinse thoroughly
WARNING: Test first. Acid can damage some brick types and glazed brick. Never use acid on sealed brick.
Enzymatic Cleaners
Best for: Mold, mildew, organic stains
Examples: Oxygen-based cleaners like Oxiclean, dedicated mold removers
Mix: 4-6 ounces per gallon water
Application: Apply, let dwell 20-30 minutes, scrub, rinse
Pros: Safe for brick and mortar, environmentally friendly, no harsh fumes
Cons: Slower than harsh chemicals, less effective on inorganic stains
Never Use These
Sandblasting: Creates permanent damage. Roughens brick surface, which then grabs dirt faster and requires more frequent cleaning. Also erodes mortar rapidly. Avoid completely.
Wire brushes: Scratch brick and mortar. Use stiff bristle brush instead.
Abrasive cleaners: Scouring powder permanently scratches surface.
Solvent cleaners: Paint thinner, mineral spirits—too harsh, don’t clean brick effectively.
Pressure washer soap: Generic detergents may not be formulated for brick masonry.
Special Considerations
Glazed Brick
Smooth, glossy surface can be etched by acidic cleaners. Test any cleaner on small hidden area first. Use alkaline cleaners or mild detergents. Lower pressure (1500 PSI) to avoid glaze damage.
Painted Brick
Some brick is painted for appearance or protection. Pressure washing can peel paint. If paint is failing (chipping, flaking), expect more paint loss during cleaning. Repainting may be required afterward.
Antique/Reclaimed Brick
Varies greatly in hardness and porosity. Some is quite soft. Test cleaning method on small area first. Start with low pressure (1500 PSI), work up only if needed.
Brick Veneer
Thin brick attached to wall with mortar. More fragile than solid brick masonry. Use lower pressure (1500-2000 PSI), wider nozzle (40-degree if needed). Be especially careful with mortar.
Sealing After Cleaning
Brick is porous—absorbs water and stains easily. Sealing after cleaning:
- Repels water
- Prevents efflorescence
- Reduces staining
- Makes future cleaning easier
- Extends brick life
Sealer Types
Penetrating sealers: Soak into brick, create invisible water barrier. Best choice—breathable, don’t change appearance. Lasts 5-10 years.
Film-forming sealers: Sit on surface, create visible coating. Not recommended for exterior brick—peel, flake, trap moisture.
Application
- Clean brick completely (remove all efflorescence and stains)
- Let dry 48-72 hours (critical—sealer traps moisture if applied to damp brick)
- Apply penetrating sealer according to directions (roller, sprayer, or brush)
- Two coats typically required
- Let cure 24-48 hours before exposure to rain
Pro Tips
Test cleaner first. Apply to small inconspicuous area, let dry completely, check for damage. Some cleaners discolor brick or damage mortar. I once turned a customer’s brick orange with cleaner—test spot prevents expensive mistakes.
Work in shade. Hot sun dries cleaner too fast, causing streaking. Early morning or overcast day ideal.
Keep nozzle moving. Never stay in one spot more than 1-2 seconds. Lingering creates marks, uneven cleaning, possible mortar damage.
Overlap passes by 50%. Ensures even cleaning, prevents streaks.
Rinse until water runs clear. Then rinse once more. Leftover cleaner causes streaking and attracts dirt.
Let it dry before judging. Wet brick looks different than dry. Wait 2-4 hours, then inspect for missed spots or damage.
Severe efflorescence needs multiple treatments. One application rarely removes heavy salt deposits. Allow brick to dry completely between treatments (48+ hours).
Consider professional for large areas. Two-story homes or large brick facades are time-consuming and physically demanding. Pros have equipment and experience to do it efficiently.
Common Mistakes
Using 0-Degree Nozzle
Cuts mortar lines rapidly, creating permanent damage. Never use red tip. 25-degree minimum.
Too Much Pressure
Above 2500 PSI erodes mortar, can damage brick face. Most effective cleaning happens at 2000 PSI.
Spraying Perpendicular
Drives water into cracks and mortar joints. Always spray at 45-degree angle.
Not Pre-Treating Efflorescence
White deposits won’t rinse off. Need chemical removal (vinegar or efflorescence remover) before general cleaning.
Sandblasting
Roughens brick permanently, making it dirt-grabbing and harder to clean. Erodes mortar rapidly. Avoid completely.
Ignoring Mortar Condition
Cleaning damaged mortar makes it worse. Repoint before cleaning if mortar shows signs of failure.
People Also Ask
Can you pressure wash brick?
Yes, at 1500-2500 PSI with 25-degree nozzle. Protect mortar by using proper pressure, wide nozzle, and correct technique. Never use 0-degree nozzle or sandblast—both damage mortar and brick.
How do you remove efflorescence from brick?
Use efflorescence remover or vinegar solution (1:1 white vinegar:water). Apply, let dwell 10-15 minutes, scrub lightly, rinse thoroughly. Severe cases may need multiple treatments. Seal afterward to prevent recurrence.
Why does my brick have white powder on it?
Efflorescence—salt deposits from water migrating through brick. Not harmful structurally but indicates moisture issues. Remove with efflorescence remover or vinegar. Prevent by reducing water intrusion and sealing brick.
Can you use bleach on brick?
Chlorine bleach not recommended—can damage brick and mortar, kills vegetation. Use oxygen bleach (Oxiclean) or dedicated masonry cleaner instead.
What PSI is safe for brick?
1500-2500 PSI. Most effective cleaning at 2000 PSI. Below 1500 won’t clean well. Above 2500 risks mortar erosion.
How do you clean brick without damaging mortar?
Use 25-degree nozzle, keep pressure under 2500 PSI, spray at 45-degree angle, avoid spraying directly at mortar lines, move constantly. If you see mortar particles flying, back off immediately.
Next Steps
Ready to clean your brick exterior?
Was this article helpful?
Your feedback helps us improve our content.
Related Articles
Washing a Two-Story House Safely: Complete Guide
Learn how to safely pressure wash a two-story house using extension wands, ladders, and proper second-story techniques. Professional methods for homeowners and contractors.
Removing Efflorescence from Brick and Pavers: Complete Guide
Learn how to identify and safely remove efflorescence (white mineral deposits) from brick, pavers, and concrete masonry. Professional techniques using acid cleaners and prevention methods.